
The planche lean looks like a small change to a high plank. Move the shoulders forward, keep the arms straight, and the exercise becomes much harder.
That difficulty comes from leverage. As the shoulders travel beyond the wrists, more body weight shifts toward the hands and the shoulder flexors must produce more torque.
Quick answer: start in a strong high plank, actively push the floor away, lock the elbows without forcing them past comfort, tighten the trunk and glutes, then lean forward only as far as you can maintain control. Use short holds, stop for wrist or shoulder pain, and progress the lean distance before trying to lift the feet.
A planche lean is not a plank held farther forward. It is a leverage drill that must be earned one controlled centimeter at a time.
What a planche lean trains
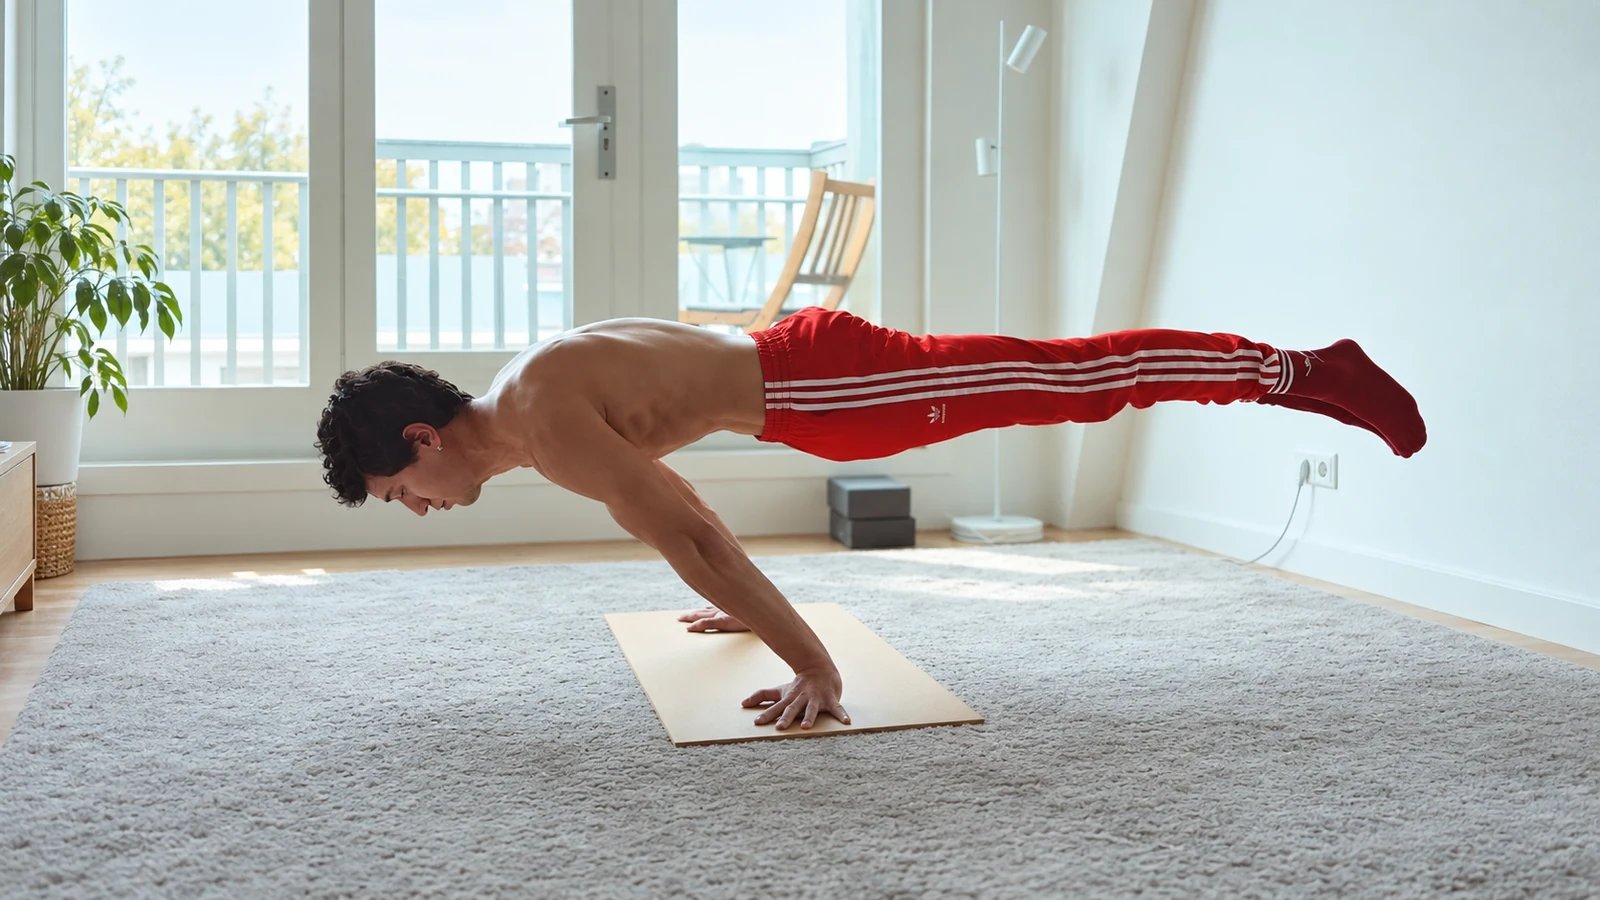
A full planche is a straight-arm gymnastics skill in which the body is supported parallel to the floor with the feet off the ground. The planche lean keeps the feet supported while rehearsing part of that demand.
The movement loads the shoulders in flexion, the elbows in a straight position, the wrists in extension, and the trunk against sagging. It also asks the shoulder blades to remain active rather than collapsing toward the spine.
Biomechanical modeling shows that planche difficulty changes with body proportions. Height, body mass, and limb lengths affect the torque required to balance the body (Wang & Shan, 2023).
That is one reason copied hold times and distances are unreliable. A lean that is moderate for one athlete can be maximal for another.
The drill is best used to build specific tolerance and body awareness. It does not make the shoulders “bulletproof,” and it cannot replace general pushing, pulling, and lower-body training.
Our seven-point program audit can help keep a specialized skill from crowding out the rest of the week.
How to set it up
Begin on a firm surface with enough room to step or shift backward. Place the hands around shoulder width and spread the fingers.
Point the middle fingers forward or turn the hands slightly outward if that is more comfortable. The best angle is the one that lets you press evenly through the heel of the hand and fingers.
Move into a high plank. Stack the shoulders near the wrists, straighten the knees, squeeze the glutes, and bring the ribs toward the pelvis.
Push the floor away until the upper back feels broad. Keep the head in line with the trunk instead of lifting the chin.
Without bending the elbows, slowly shift the shoulders forward. The toes remain on the floor and slide or pivot as needed.
Stop before the hips sag, the elbows soften, or the shoulders lose active support. Hold briefly, then shift back under control.
A line of tape beside the hands can make lean distance measurable. Progressing from 5 to 7 centimeters is more useful than guessing that a hold looked harder.
Shoulder and scapular position
The social instructions say to protract the shoulders by pushing the floor away. That cue is useful, but “round the upper back” can be misunderstood.
Protraction means the shoulder blades move around the rib cage. The goal is active support, not collapsing the chest or forcing an extreme spinal curve.
The shoulders also need to tolerate increasing flexion torque as the body moves forward. The farther the center of mass travels from the hands, the larger the demand becomes.
Keep the front of the shoulder feeling strong and organized. A pinching sensation, sudden loss of force, or sharp pain is a reason to stop.
Scapular control is easier to learn in simpler drills. Plank plus movements, where the elbows stay straight while the chest gently moves toward and away from the floor, can teach the difference between protraction and collapse.
Push-ups and straight-arm support holds can build general capacity before aggressive leans. Our guide to dead hangs and shoulder tolerance also explains why range must follow control rather than precede it.
Wrist and elbow management
The wrists often become the limiting factor before the shoulders. A planche lean combines wrist extension with a growing share of body weight.
Warm up with gentle wrist circles, palm rocks, and low-load quadruped shifts. The goal is readiness, not stretching into irritation.
Use parallettes if floor extension is uncomfortable and the neutral grip feels better. Parallettes change balance and height, so treat them as a different setup rather than a loophole.
The elbows should stay straight, but “locked” does not mean pushed aggressively into hyperextension. Athletes with naturally mobile elbows may need to think about active biceps tension and a stable crease orientation.
Pain at the thumb side of the wrist, persistent soreness, tingling, or loss of grip strength deserves attention. Reducing lean distance is more productive than accumulating irritated practice.
Training on a soft mattress is not a good solution. An unstable surface makes hand pressure less predictable and can complicate balance.
The lean-readiness ladder
Use four stages and advance only when the current one is quiet, repeatable, and controlled.
- High plank support: hold 20 to 30 seconds with straight arms, active shoulder blades, and no sagging.
- Rocking plank: shift forward and backward for 6 to 10 slow repetitions while keeping the same body line.
- Measured planche lean: hold a repeatable lean for 8 to 15 seconds without wrist or shoulder pain.
- Greater leverage: add a small distance, elevate the feet slightly, or begin a tuck progression with qualified coaching.
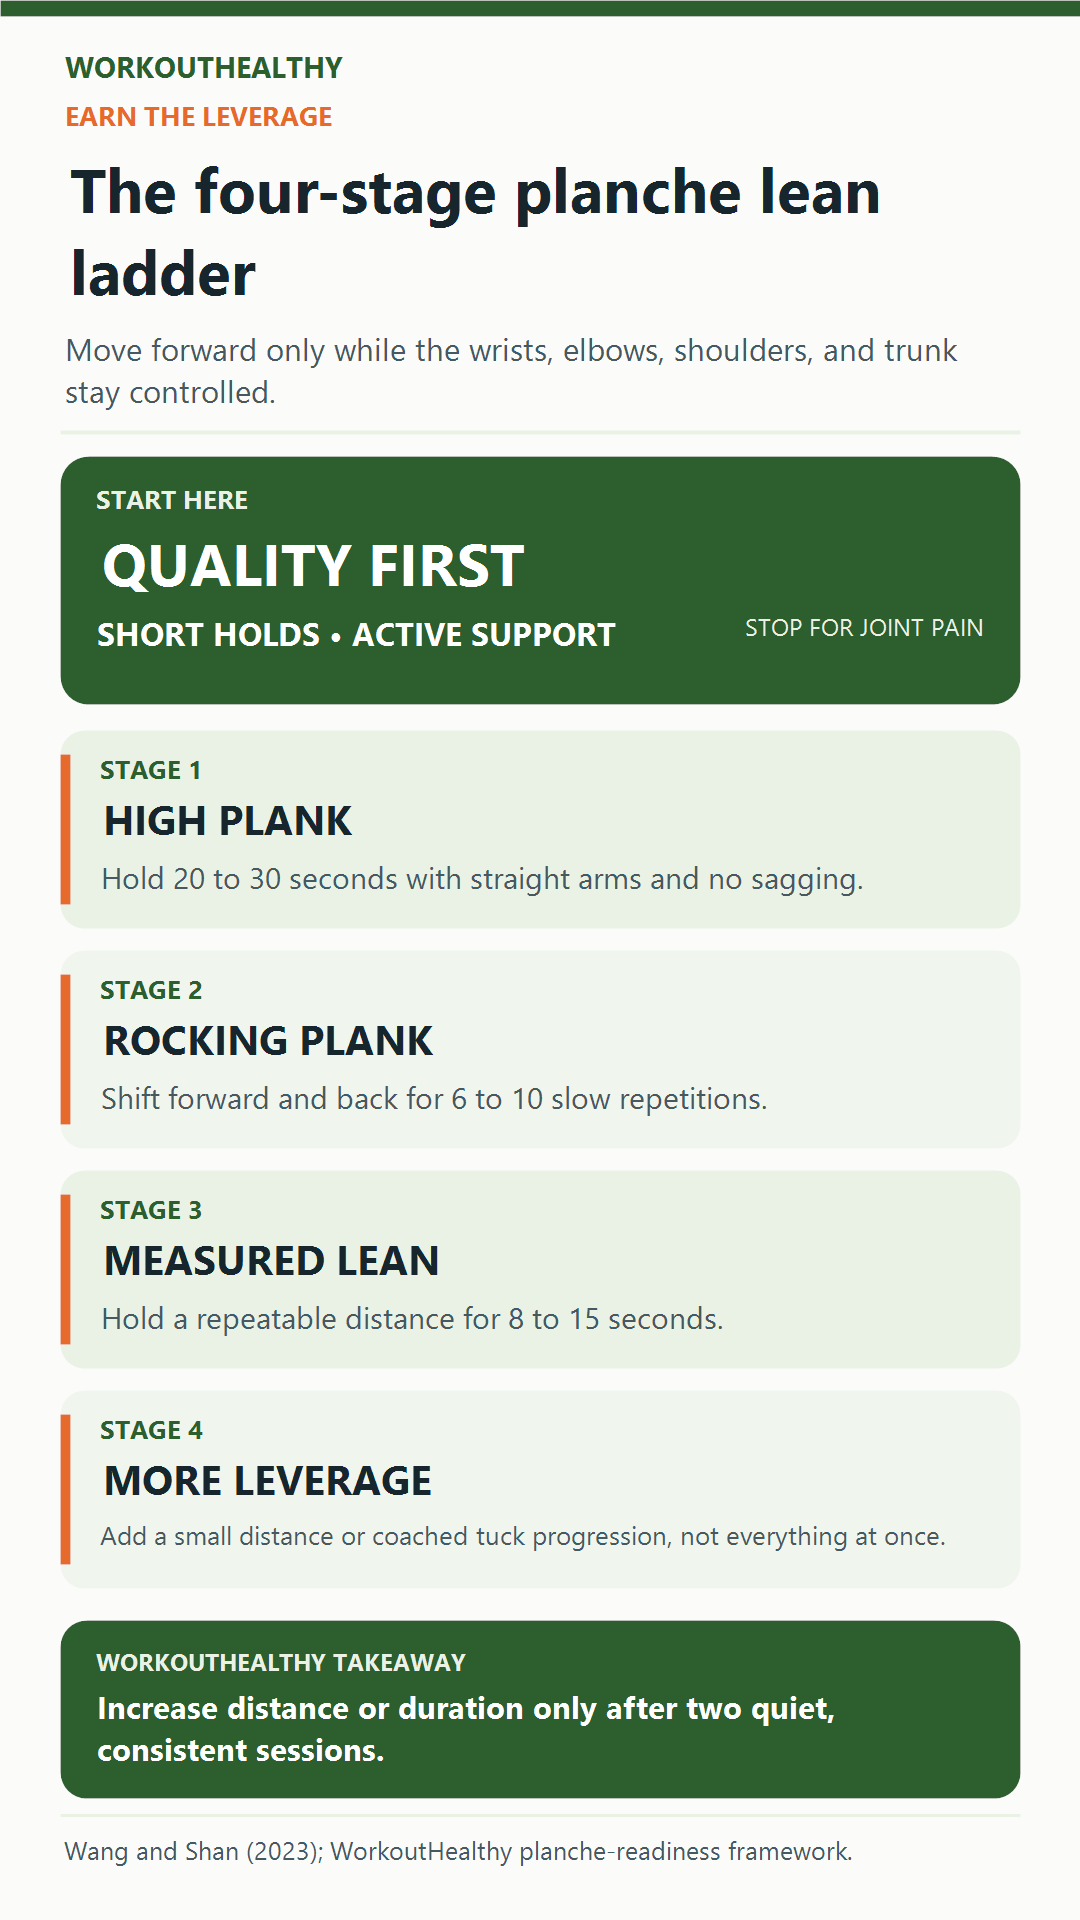
Only change one variable at a time. Adding distance, duration, elevated feet, and more sets together makes the cause of irritation impossible to identify.
Progress is a cleaner position under slightly more leverage, not a longer struggle in a shape you cannot control.
Sets, holds, and frequency
The viral recommendation of three to four sets, two to three times per week may suit some trained athletes. It is too specific to be a universal starting dose.
Begin with two or three sessions separated by at least a day. Use three to five controlled holds of 5 to 10 seconds.
Stop each hold while you still have a small reserve. Skill quality declines quickly when the wrists, elbows, or shoulder stabilizers fatigue.
If every hold remains consistent for two sessions, add one or two seconds or move the shoulders slightly forward. Do not increase both at once.
Pair the skill with balanced strength work. Rows, pull-downs, push-ups, overhead pressing within tolerance, and lower-body training support general capacity.
The 2026 ACSM position stand emphasizes that resistance training should match the goal and the person. Consistency matters more than advanced methods.
Record hold time, lean distance, perceived effort, and next-day wrist response. Our training-log guide shows how those notes can drive the next decision.
Place the planche work early in the session after a warm-up. Straight-arm skill is easier to practice before push-ups, pressing, or heavy pulling fatigue the shoulders and grip.
Rest long enough for the next hold to look like the first. Sixty to 120 seconds is a reasonable starting range, with more rest when the lean is demanding.
Volume should fall when leverage rises. A larger forward shift can require shorter holds or fewer sets even if the movement appears almost unchanged on video.
Use easier weeks. Every fourth or fifth week, reduce lean distance or total holds if the wrists feel persistently loaded. Planned reduction is better than waiting for pain to force a break.
General wrist conditioning can include controlled flexion, extension, and grip work. It should support the skill without creating fatigue that makes hand placement unstable.
Keep pulling volume in the week. Rows and pull-downs do not directly create a planche, but they help maintain a balanced shoulder program.
If a coach reviews form, record the same camera angle and distance each time. Consistent video makes small changes in lean and body line easier to see.
Common mistakes
The first mistake is leaning farther by bending the elbows. That turns the drill into a different exercise and removes the straight-arm demand you meant to train.
The second is letting the hips sag. A broken body line shortens the lever and can shift stress into the lower back.
The third is holding the breath. Breathe quietly and keep the brace instead of using one prolonged strain for every repetition.
The fourth is chasing the feet-off-floor version too soon. A full planche requires far more strength and balance than a basic lean.
The fifth is treating discomfort as proof that the exercise works. Muscular effort is expected. Sharp joint pain, tingling, or worsening symptoms are not useful training signals.
The sixth is practicing only the hardest position. Easier high-quality sets provide more usable time under tension and better technique rehearsal.
The bottom line
A planche lean is a demanding straight-arm leverage drill. Its value comes from controlled shoulder travel, active scapular support, a rigid trunk, and patient exposure.
Start closer to a high plank than your ego prefers. Measure the lean, keep the holds short, and let symptom-free consistency determine progression.
The feet-off-floor image is the destination, not the entry requirement. Strong wrists and shoulders are built through doses you can repeat.
References
American College of Sports Medicine. (2026). Resistance training prescription for muscle function, hypertrophy, and physical performance in healthy adults.
Wang, X., & Shan, G. (2023). Insights from a nine-segment biomechanical model and its simulation for anthropometrical influence on individualized planche learning and training in gymnastics. Bioengineering, 10(7), 761.
Medical disclaimer: This article is general product information, not medical advice. The equipment described here is not a treatment for any condition. If you have an injury, ongoing pain, or a medical condition, talk to a doctor or physical therapist before using any of it.